Linking Items within the Application

One of the highlight features of Produktyf CRM is ability to link different items together to represent relationships and associations between them.
Linking items allows you to create a powerful relationship-based database which makes finding relevant information in the right context very easy.
For example you can link a Note item containing information about your call with your supplier to the Contact items of the people participating in this call and then link it to Project opportunity this call is about. Later, when you view Contact details for the Contact linked to this note you will be able to see the note as well as other notes, projects and other linked information related to this contact.
The following item types can be linked together:
| Note or Action (1) can be linked to: |
| Contact (2) |
| Company |
| Project |
| Item |
| Contact can be linked to: |
| Note / Action (2) |
| Company (2) |
| Project (2) |
| Item |
| Company can be linked to: |
| Note / Action |
| Contact (2) |
| Project |
| Item |
| Project can be linked to: |
| Note / Action |
| Contact (2) |
| Company |
| Item |
| Item can be linked to: |
| Note / Action |
| Contact |
| Company |
| Project |
(1) Actions are not a separate content type but rather a Note with a type set to an 'Action'.
(2) This relationship allows setting additional properties. See below for more information.
How to Link an Item to Another Item
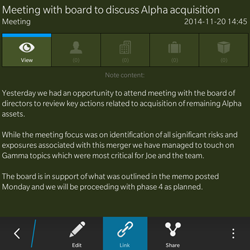
1. Items can be linked from the item details screen by selecting the 'Link' action on the action bar to bring up the "Link Items" screen shown in step #2.
Note in this example does not have any items linked to it.
Note in this example does not have any items linked to it.
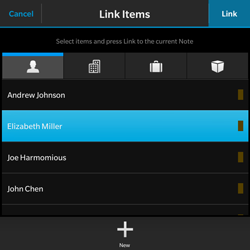
2. The Link Items screen allows selecting items which can be linked with the current item.
The tab bar on the top part of the screen allows switching between types of items to link.
Select an item (or multiple items) to link and press "Link" button in the top-right corner to link them
You can also create new items by pressing New action at the bottom.
You can also create new items by pressing New action at the bottom.
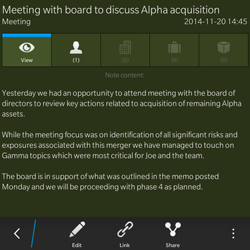
3. Upon returning to the Note Details screen the tabs reflect number of linked items with this Note.
The linked Contacts tab shows one contact is now linked.
4. Switch to the linked Contacts tab to see the Contacts linked with this note.

5. Tap on the linked Contact to open the Contact Details screen for the selected contact.
The new screen is added to the stack on top of the current screen.

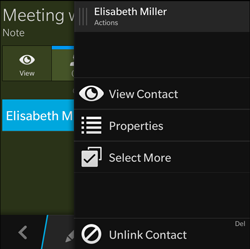
6. Long press the linked Contact to bring up context menu.
To unlink the selected contact from current note press "Unlink".
It is also possible to set additional properties on selected link using the "Properties" context action. More on this below.
To unlink the selected contact from current note press "Unlink".
It is also possible to set additional properties on selected link using the "Properties" context action. More on this below.
Setting Properties on Links New in version 1.3.0
Links between certain items allow specifying additional properties to further describe the relationship between them.
For example when linking Contact with a Company it may be useful to capture the role (or position) this person holds in the company.
The following links allows settings properties:
The following properties can be set on a link between Contact and Note (or Action):
Role: Allows specifying what role linked Contact has in this Note, for example linked Contact can be an Author, Editor, Approver, etc. The list of roles can be edited and new roles can be added as required.
Role: Allows specifying what role linked Contact has in this Note, for example linked Contact can be an Author, Editor, Approver, etc. The list of roles can be edited and new roles can be added as required.
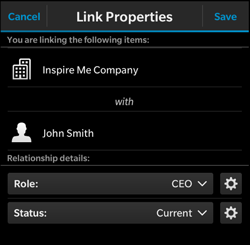
The following properties can be set on a link between Contact and Company:
Role: Allows specifying what role linked Contact has in this Company. For example linked Contact can be a CEO, Director, Project Manager, etc. The list of roles can be edited and new roles can be added as required.
Status: Specifies the status of the relationship between Contact and Company (Current or Previous). The list of statuses can be edited and new statuses can be added as required.
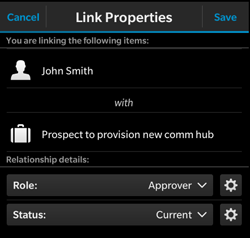
The following properties can be set on a link between Contact and Project:
Role: Allows specifying what role linked Contact has in this Project. For example linked Contact can be a Vendor, Sponsor, Client, etc. The list of roles can be edited and new roles can be added as required.
Status: Specifies the status of the relationship between Contact and Project (Current, Previous, Full-time, Part-time, etc). The list of statuses can be edited and new statuses can be added as required.
How to Set Properties New in version 1.3.0
1. To set a property select existing link by clicking on a linked item and long-press to see the context menu.
Select "Properties" action to bring up the "Link Properties" screen.
Select "Properties" action to bring up the "Link Properties" screen.
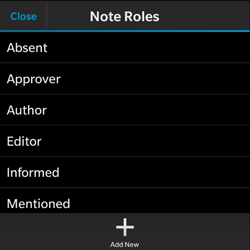
3. This screen allows editing existing or adding new roles.
Application comes with a set of default roles but new once can be added.
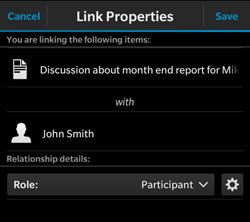
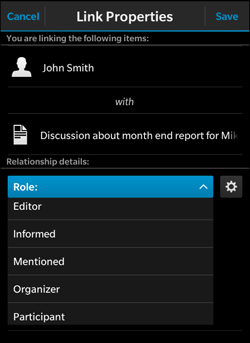
2. The "Link Properties" screen allows setting available properties for the selecter relationship.
In this example the link between Contact "John Smith" and meeting Note allows setting "Role" property which indicates what role does John Smith play in this role. You can select one role from the list of default roles or can add new roles by clicking the gear icon to the right of the role drop down.
In this example the link between Contact "John Smith" and meeting Note allows setting "Role" property which indicates what role does John Smith play in this role. You can select one role from the list of default roles or can add new roles by clicking the gear icon to the right of the role drop down.
Viewing Properties on Links New in version 1.3.0
When viewing linked items which support properties it is possible to see the property value directly from the linked tab.
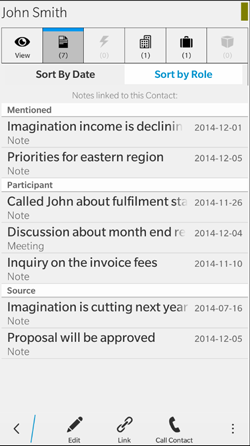
In this example the Contact entry for John Smith has seven notes linked to it. There are two Notes in which John is "Mentioned", three Notes for meetings or calls where John participated as a "Participant" and two Notes which are based on information provided by John (he is listed as a "Source" for these Notes).
When displaying the "Linked Notes" tab in the Note Details screen we can see all Notes linked with this contact. The linked notes can be groupped by Date or by Role. When grouping by date the role name is displayed below the tile of the linked note. When grouping by Role the list groups all notes by role and displays the data in groups.